If you need help with Edit Window choose EDIT WINDOW PROPERTIES. If you only want information about the commands on the menu bar choose any of the following:
This program contains different dialogs such as Paramlist Dialog (Parsetup Configuration) and Pulse Dialog (Pulse Configuration). For further information choose either:
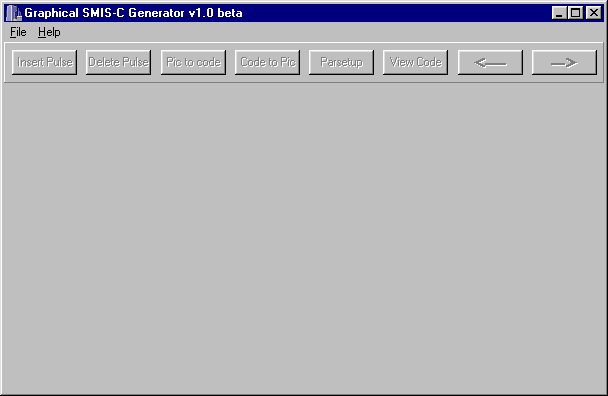
The content of the menus of the Main Window will be considered next.
File Menu

Load: loads the basic file.
Exit: exits the program.
Help Menu
About: Shows you the version number and also the developers of
the program. The command Help appears in the Help menu when the
Edit Window is active.
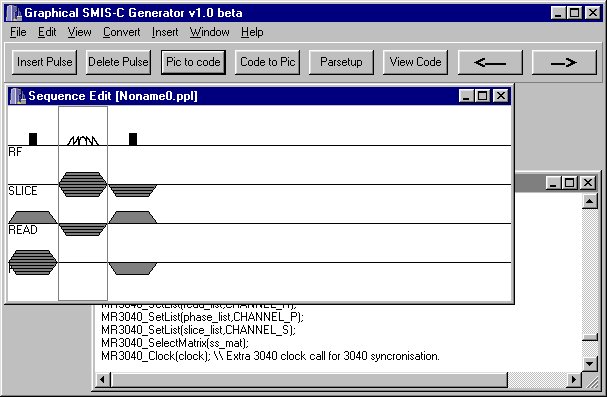
At first you have only RF, SLICE, READ, and PHASE lines in the Sequence Edit Window. Now the user can add pulses, delays and comments to the sequence. The delays can be added at the same way as the pulses but then you must not choose any of the channels active.
If you want to get information about the buttons at the top of the Edit Window click Edit Window Buttons.
By using the arrows in the edit window you can easily move the sequence elements into different positions.
The menu bar at the top of the window offers everything you need to
edit your NMR-sequence. The menus belonging to the Edit Window are explained
next.
The File menu commands allowes you to create, open, save, print and close files.
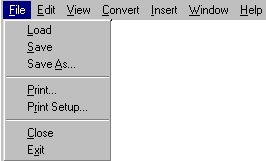
Load: Loads a file into an Edit window . If you load a file that is already open in an Edit window, the Open command loads the file from disk into a new Edit window, leaving the original in the other Edit window.
Save: Saves the file in the active window. The files are saved as SMIS-C-code.
Save As: Allowes you to save the file in the active Edit window into a different name, in a different directory, or on a different drive. If you choose an existing file name, the existing file will be overwritten..
Printer Setup: Displays the Printer Setup dialog box where you select which printer you want to use for printing.
Print: Lets you print the contents of the active Edit window.
Close: Closes the active window.
Exit: Exits the sequense editing session.
The Edit menu commands allows you to undo, redo, cut, copy and paste information in the Edit window.

Cut: If the Edit Window is active then cut removes the text selected from your document and places the text into the Clipboard. If the Sequence Edit Window is active then cut removes the selected pulse and places it as text in the Clipboard.
Copy: If the Edit Window is active then copy Leaves the text selected untouched and places an exact copy of it into the Clipboard. If the Sequence Edit Window is active then copy copies the information of the selected pulse into Clipboard in text format.
Paste: Inserts the contents of the Clipboard into the current window at the cursor position. If the Sequence Edit Window is active then paste tries to insert a new pulse into the sequence using the text in the Clipboard as a base for the pulse attributes.
The View menu gives you the tools needed to keep up with the SMIS-C-code.

Code Edit: Shows the created SMIS-C-code.
Parsetup Configuration: Gives you an opportunity to edit the parameters of the PARSETUP-program.
The Convert menu commands allow you to make a conversion from the picture to the SMIS-C-code and from the code to the picture.

Picture To Code: Converts the graphical sequence picture into code, the code can be seen behind the sequence window in the Code Window.
Code to Picture: Converts the code into a graphical sequence picture.
The Insert menu commands allows you to add the suitable component to the Edit window.

Pulse: Allows you to choose the desired pulse. You can choose either RF-pulse or a gradient pulse.Choosing this will open the Pulse Configuration Dialog, from which you can get further information in Pulse Dialog
Comment: Allows you to add a comment into the sequence.
The Window menu contains the usual commands to arrange windows.

Tile: Arranges the opened windows so that they are displayed next to each other.
Cascade: Stacks all open windows and overlaps them so that a part of each underlying window is visible.
This command displays the help window which gives information about how to use Graphical SMIS-C Generator.

About: Shows the version number and also the developers of the program.
Help: Gives you information about how to use Graphical SMIS-C
Generator v1.0 beta program.
Help is created with HyperTEXT Markup Language(HTML) .
These are the basic buttons you need while editing the sequence.
Insert Pulse: Opens the pulse dialog.
Delete Pulse: Deletes the chosen pulse element.
Pic to Code: Converts the sequence into a code. The code can be seen in the Code Window.
Code to Pic: Converts the code into a graphical picture.
Parsetup: Opens the Parsetup dialog.
View Code: Opens the Code Edit window to see the generated code.
The arrows allow you to change positions of the pulse elements.
When you start creating new sequence you have to define the parameters of the PARSETUP -program. The Parsetup Configuration is opened by choosing the menu command File -> Load or pushing the Parsetup-button in the Edit Window.
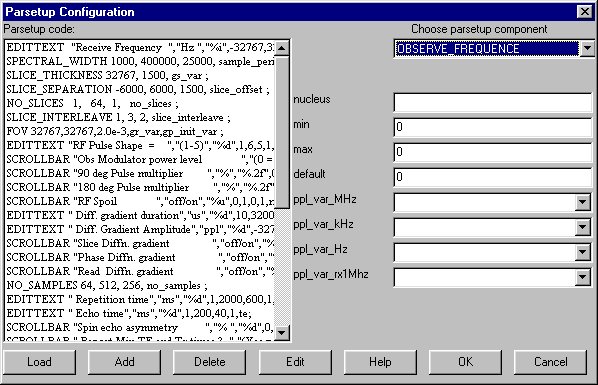
At first you have the buttons Load, Add, Delete, Edit, Help, OK, Cancel and also ListBox and ComboBox. By pushing Load the following warning message will appear:
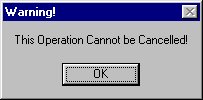
This means that you can't cancel loading the file by choosing Cancel in the Paramlist Dialog. By pushing the OK-button the required file can be loaded. You can now see the measuring components in the Parsetup Code-listbox. You can edit its parameters by choosing the component from the Chooce Parsetup Component-combobox which reveals the variables of the chosen component. When you push the Add-button the component is added to the list.
You can edit the parameters of the PARSETUP-program either by double clicking the component or marking the component in the ListBox and then pushing the button Edit. Then the following dialog is opened:

This gives you an opportunity to edit the whole row of variables.
Descriptions of the components in the paramlist dialog:
Parsetup code-Listbox gives you a list of the parsetup-components.
Choose Parsetup component-Combobox shows you the list from which you can choose parsetup components: After choosing a component a list of parameters of the component are opened. These parameters are of three different types: integer, char and variables. The variables are chosen from the list defined beforehand. Integers and chars are given to the edit field.
Load: Loads the wanted file. Without loading you can’t create the pulse sequence. Loading of the code can’t be stopped at the parsetup dialog by pushing the Cancel-button.
Add: Adds a new component to the parsetup code list. If there is something wrong in the values of the component’s parameters, program gives you a warning.
Delete: Deletes a component from the code list, which is currently chosen. The keyboard delete button has the same effect.
Edit: Gives you a chance to edit the chosen component. You can also edit the component by clicking the object twice.
Help: Gives you help on parsetup dialog. .
OK-button: The changes of the user to become valid and closes the parsetup dialog
Cancel-button: Cancels the made changes except the loading of the basiccode
By using the Pulse dialog the user can easily add pulses, delays and comments into the sequence. The Pulse dialog can be opened either by choosing the menu command Insert -> Pulse or pushing the button Insert Pulse.
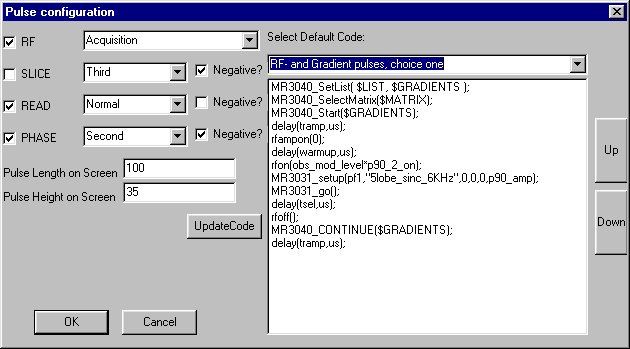
Pulse Length on Screen gives you an opportunity to define the
lenght of the pulses in the Sequence window.
Pulse Height on Screen gives you an opportunity to define the
height of the pulses in the Sequence window.
These two commands have no effect to the actual code.
In this dialog you have to define pulses location ( RF, SLICE, READ and PHASE ) at the sequence window .The user can also choose what kind of pulse is drawn on each line Normal, Second or Third and whether the pulse is "negative" ( Negative? ).
The user has a chance to choose from basic structures how the pulses
are created.
These structures can be seen in the Select Default Code-list
by clicking the wanted alternative. Furthermore by clicking the UpdateCode-button
the user may choose variables defined in code beforehand which replace
words beginning with $-mark in those basic structures.Then the following
two windows will be opened.
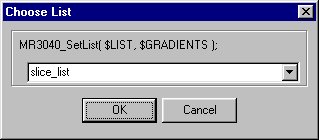
With the dialog the user can choose from ComboBox the wanted list which replaces the word $LIST. $GRADIENTS is replaced automatically defined by the channels chosen in the Pulse Dialog.
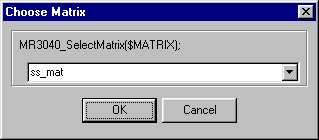
With this dialog the user can choose from ComboBox the wanted matrix which replaces the word $MATRIX.
The maintenance of the program is taken care of with the .dat files. A more thorough description of those files is given next.
Config.dat
pulse_name is the name of the file where the picture is. The pulses must be in the .bmp format and drawn with two different colours. The sizes of the pictures can be chosen, but the pictures in this program are drawn in the size of 184x190. The pictures of the pulses must be in the same file as the program.
location is either BOTTOM, CENTER or TOP.
BOTTOM means that the bottom of the pulse is placed in the line.
CENTER means that the center of the pulse is placed in the line.
TOP means that the top of the pulse is placed in the line.
The rows started with the sign * are handled as a comment.
For example:
rfpulse.bmp BOTTOM Excellent picture of the
RF-pulse
Parameters are three different types: int, string and variable.
Int also takes parameters like this:
Example of parsetup-component:
There are some rules about how the default codes are written in these
files:
You can insert some special variables to the default code:
For example:
RF pulse only, choice one
MR3040_SelectMatrix(gauss_mat);
MR3040_Start($GRADIENTS);
delay(tramp,us); delay(gauss_spoil,ms);
MR3040_CONTINUE($GRADIENTS);
delay(tramp,us); #
Funcmac.dat
"Name" Is the name of the function or MACRO. Should be inside the quotation marks. Name should not include blanks or tabulators.
PARENTHESES is a Value that should be either 0 or 1. If the value is 0 the arguments of the function or of the MACRO are not inside the parentheses. If the value is 1 the arguments of the function or the MACRO are inside the parentheses.
NMBR_OF_ARGS specifies the number of arguments of the function.
"Stop_Marks" specifies the marks that could be at the end of the function, right after the arguments. One of these marks should be found when the program reads the function.
TIMING specifies the time that the function takes when function is called.
All the lines that doesn't have the { mark at the beginning of the line will be skipped. All the lines that are not in the form described above will be skipped. The tabulators and the blanks don't mean anything in the lines (Except inside the quotation marks). All the marks after the } mark will be skipped and so they can be anything.
Example1:
You want that the program identifies the following MACRO:
Example2:
You want that the program identifies the following function:
function(arg1,arg2,arg3,arg4,arg5);
You must write the following line to the file funcmac.dat:
Example3:
You want that the program identifies the following function:
function arg1,arg2;
You must write the following line to the file funcmac.dat:
Copyright © 1997 AIVO.